CPPI Autodesk Build Payment Application Process
1. To commence the billing process for the Payment Application, a Project Manager will send you an invitation to the Cost Management Module in Autodesk Build via email.
- Note: If notifications are being sent to the incorrect individual, please reach out to the CPPI Project Manager and request that they update the recipient to the appropriate person.
Example Invitation email from CPPI Project Manager

2. Before the payment applications are due, the PM will send you an email request to enter and upload your payment application for the monthly period. Click on the “Open in Cost Management” link in the email from Autodesk Build, and it will direct you to the current monthly billing in Autodesk Build. Using the "Reply via Email" option may delay your payment.
Example Payment Application Request email

"Open in Cost Management" example
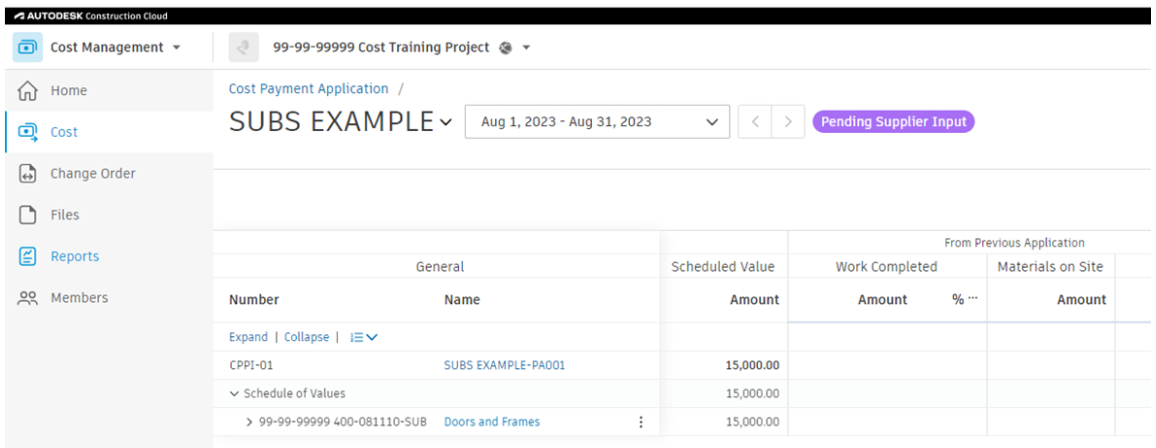
3. Scroll to the right to see the “This Period Work Completed” and “This Application Materials on Site” columns.

4. Enter either your gross billing or percentage in the fourth row down in either “This Period Work Completed” or “This Application Materials on Site” column (or both) depending on your billing.

5. Note: If your contract does not require you to hold retainage, scroll to the very right and input zero into the “Total Retained” column.

6. After inputting your gross billing, click on the highlighted name in the second row of the second column and a fly-out will pop out on the right side.

7. In the fly-out, scroll down to view and double-check your payment application summary.

8. After double checking your payment application summary, keep scrolling to the “Documents” section in the fly-out to upload your signed and notarized payment application with your complete schedule of values. Please also uploaded your signed and notarized partial or final lien release.
a. If you need a partial or final lien release, click “Add document” and “Generate from document template” (see snip below). This will generate an excel version of your lump sum pay app with the partial or final release filled out with through date (if partial) and amount. Print out release, sign, notarize, and upload to the “Documents” section.

9. Upload to “Attachments.” You can either click “add document” and upload from your computer, or drag and drop the file to the “Attachments” Section.
10. Once inputting both your gross billing and uploading your payment application with complete schedule of values, scroll back up to the top of the page and click “Submit.”

11. If you are not billing for the monthly period, please communicate this to your PM.
Having trouble? We are here to help! Please create a ticket using the CPPI Subcontractor Support Portal at https://subs.cppi.com
Was this article helpful?
That’s Great!
Thank you for your feedback
Sorry! We couldn't be helpful
Thank you for your feedback
Feedback sent
We appreciate your effort and will try to fix the article